▍引言
你是否好奇浏览器是如何渲染一个页面的呢?
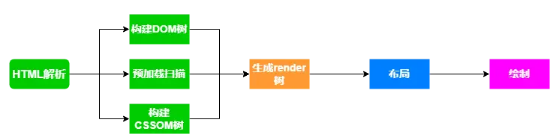
浏览器渲染网页的过程可以简单分为以下几个步骤:
HTML解析: 在进行HTML解析之前,浏览器进行DNS解析和TCP握手等网络协议操作,与用户要访问的域名服务器建立连接。域名服务器返回一个HTML文本,用于后续的渲染(这一点非常关键,请注意)。
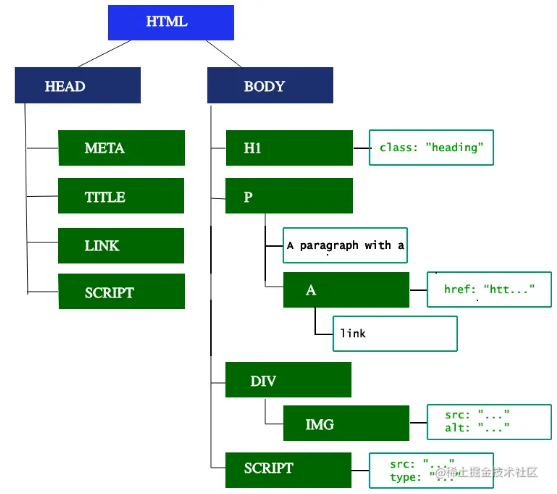
渲染树构建: 浏览器客户端接收到服务端返回的HTML文本后,对HTML文本进行解析。DOM用于生成DOM树,决定页面的布局结构,而CSS则生成CSSOM树,决定页面元素的样式。在这个过程中,如果遇到脚本或静态资源,会执行预加载以提前请求静态资源,最终形成一个渲染树。
布局: 浏览器在获得渲染树后进行布局操作,以确定页面上每个对象的大小和位置,然后进行渲染。
渲染: 电脑视图是通过GPU的图像帧显示的。渲染的过程是将获得的渲染树转换为GPU的图像帧来显示。浏览器首先进行栅格化,将页面按行列划分成对应的层,例如12栅格。然后根据布局树的位置得到一个合成帧,包括文本、颜色、边框等。最终将合成帧升级到GPU的图像帧,显示在页面上,从而呈现在我们的电脑上。
服务器端渲染对C端网站的优势主要在于它获得的HTML不同。这样的差异会为Web应用带来不同的表现。如果你想深入了解搭建SEO项目以及Next.js SSR实战,我们将在下文中为小白提供详尽的入门教学。
▍SSR 优势
易传播性:提高搜索引擎匹配准确度
搜索引擎可以被视为一种爬虫,负责爬取指定页面的 HTML,并根据用户输入的关键词对页面内容进行排序和检索,最终呈现给用户。在页面渲染过程中,对于高级爬虫,它们可能会等待页面渲染完成后提取数据并进行关键词匹配。相反,低级爬虫则可能直接从服务器拉取HTML。在这一过程中,服务器端拉取的HTML中包含的实际页面关键词和数据越多,搜索引擎匹配的精度也越高。
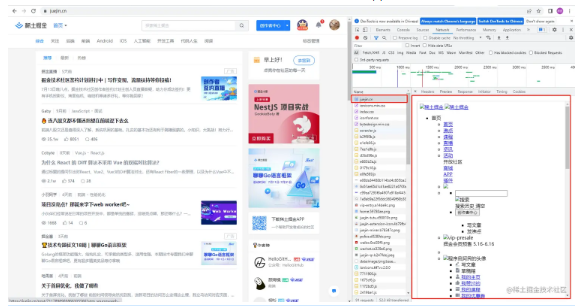
SSR在服务器端完成对页面数据的请求,将相应数据注入DOM并一同返回,产生一个包含实际数据的完整可预览的HTML。以掘金首页为例,服务器端拉取的HTML包含即将展示的实际数据。
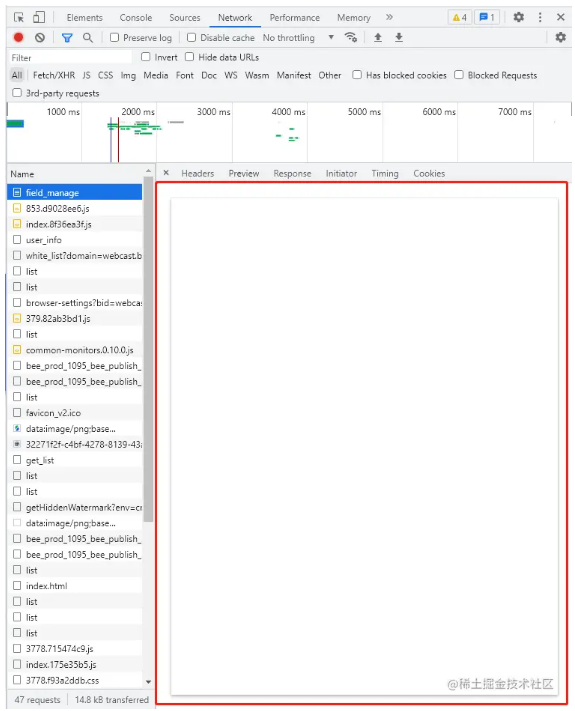
相对于客户端渲染,SSR的数据拉取过程在服务器端完成,而客户端渲染则在客户端执行。客户端渲染页面的服务器响应的HTML通常是一个包含执行脚本但不包含实际数据的空HTML,这也可参考B端管理平台的HTML响应。由于服务器端渲染和客户端渲染存在差异,决定了在爬虫关键词爬取的精准度上,服务器端渲染明显优于客户端渲染,使站点更容易在相关关键词排名上获得更高的位置。
交互稳定性:提升效率
在交互稳定性方面,SSR表现更为高效。客户端渲染需要在执行脚本后请求数据,而SSR在服务器端已完成数据请求,因此具有更短的首屏时间。这使得SSR在维持交互稳定性方面更具优势,因为无需等待脚本执行和数据请求,可以更快地呈现页面内容,提高用户体验并确保页面加载效率。
▍项目初始化
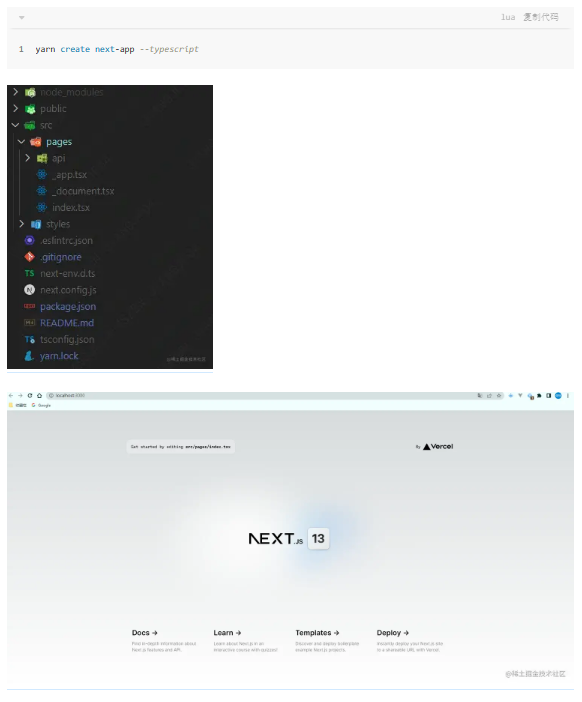
创建项目
yarn create next-app --typescript
配置别名
// next.config.js const path = require("path");
module.exports = {
reactStrictMode: true, swcMinify: true, webpack: (config) => {
config.resolve.alias = { ...config.resolve.alias,
"@": path.resolve(__dirname), };
return config; }, };
在 tsconfig.json 中添加对应的别名解析识别(baseUrl, paths)。
{ "compilerOptions": { // ...其他设置 "baseUrl": ".", "paths": { "@/*": ["src/*"], "@public/*": ["public/*"] } }, // ...其他设置}
目录结构

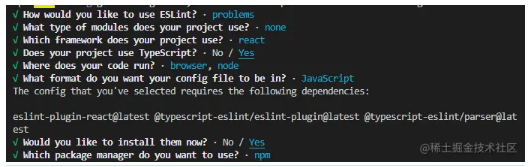
ESLint
安装依赖
yarn add -D eslint eslint-plugin-react -eslint/eslint-plugin -eslint/parser eslint-plugin-simple-import-sort npx eslint --init
创建 .eslintrc.js
// .eslintrc.js
module.exports = { env: { browser: true, commonjs: true, es2021: true, node: true, }, extends: [
"eslint:recommended",
"plugin:react/recommended",
"plugin:@typescript-eslint/recommended",
"plugin:import/recommended", ], parser: "@typescript-eslint/parser", parserOptions: { ecmaFeatures: { jsx: true, }, ecmaVersion: "latest", }, plugins: ["react", "@typescript-eslint", "eslint-plugin-simple-import-sort"], rules: {
// ...其他规则 }, };
在原有配置的基础上,添加对 commonjs 全局变量的识别。
React 17 不再需要显式引入 React
在 React 17 之后,JSX 的页面已经不再需要显式引入 React,因此我们去掉了 react/jsx-uses-react 和 react/react-in-jsx-scope 这两个 lint 规则。
禁用对 require 的使用
为了避免使用 require 来定义,我们禁用了 @typescript-eslint/no-var-requires 这个规则。考虑到 Node.js 中很多相关的依赖没有对 ES Module 的定义,我们做了这个调整。
关闭组件定义缺少显示名称的警告
我们关闭了 react/display-name 规则,以消除组件定义缺少显示名称的警告。在某些情况下,显示名称可能并非必需,因此我们根据实际情况进行了调整。
使用 eslint-plugin-simple-import-sort 进行 import 排序
为了提高代码的可维护性,我们引入了 eslint-plugin-simple-import-sort,以实现 import 语句的自动排序。这样可以确保导入语句的一致性,使代码更易于理解。
处理重复导入问题
通过安装 eslint-plugin-import 插件,并添加 plugin:import/recommended,我们关闭了 no-duplicate-imports 规则,以自动修正 import 重复导入的问题。
关闭无法解析导入的警告
为了消除无法解析导入的警告,我们关闭了 import/no-unresolved 规则。这有助于避免在项目中出现导入路径无法解析的问题。
Commit
安装依赖
yarn add -D @commitlint/config-conventional @commitlint/cli
新增 commitlint.config.js
module.exports = { extends: ["@commitlint/config-conventional"], rules: {
"type-enum": [2, "always", ["feat", "fix", "revert"]],
"subject-max-length": [1, "always", 30], }, };
其中,type-enum 指定了 commit 正文的前缀,通常使用三种类型:Feat、Fix、Revert。subject-max-length 对应实际 commit 长度(不包括前缀),这里设置为30。
Husky
安装依赖
yarn add -D husky npx husky install npx husky add .husky/pre-commit
.husky/pre-commit
.
"$(dirname -- "$0")/_/husky.sh"
npx commitlint --edit $1
npm run lint
Prettier
在 VSCode 安装 Prettier - Code formatter 插件。
安装依赖
yarn add -D prettier eslint-plugin-prettier
创建 .prettierrc.js
module.exports = { singleQuote: false, trailingComma: "all", printWidth: 80, htmlWhitespaceSensitivity: "ignore", };
.vscode/settings.json
{ "editor.formatOnSave": true, "editor.defaultFormatter": "esbenp.prettier-vscode", "editor.codeActionsOnSave": { "source.fixAll.eslint": true, "source.fixAll.stylelint": true }, "stylelint.validate": ["css", "less", "scss", "vue"], "[scss]": { "editor.defaultFormatter": "esbenp.prettier-vscode" }}
添加 .editorconfig 定义编码风格
# top-most EditorConfig file
root = true
[*]
indent_style = space
indent_size = 2
end_of_line = lf
charset = utf-8
trim_trailing_whitespace = false
insert_final_newline = false
Stylelint
安装依赖
yarn add -D stylelint stylelint-config-clean-order stylelint-config-prettier stylelint-config-standard stylelint-config-standard-scss stylelint-prettier
创建 stylelint.config.js
module.exports = { processors: [], extends: [
"stylelint-config-standard-scss",
"stylelint-config-standard",
"stylelint-prettier/recommended",
"stylelint-config-prettier",
"stylelint-config-clean-order", ], rules: {
// ...其他规则 }, };
部署和打包环境搭建
在项目开发过程中,为了及时发现潜在问题并减少上线后的并发问题,定期进行静态文件的打包和本地预览是一种有效的做法,尤其在引入组件库之前更显得重要。
安装 cross-env
为了区分不同的环境变量,我们使用 cross-env 这个工具,它可以在不同平台上设置和使用环境变量的脚本。
yarn add -D cross-env
配置环境变量
添加 .env.development、.env.test、.env.production 文件,并写入相应的配置。注意,为了在浏览器环境中访问这些变量,需要添加前缀 NEXT_PUBLIC_,否则打包后将无法在页面中访问。
NEXT_PUBLIC_HOST = https://junfeng530.xyz
添加打包脚本
在 package.json 中添加以下脚本命令,分别用于测试环境和生产环境的打包。
"scripts": { "build": "cross-env NODE_ENV=test next build", "export:test": "cross-env NODE_ENV=test next build && next export", "export:prod": "cross-env NODE_ENV=production next build && next export"
}
安装 http-server
全局安装 http-server 用于本地预览静态文件。
npm install -g http-server
查看静态文件
运行以下命令进行静态文件的导出和本地预览:
yarn export:test
cd out http-server
样式、模块化代码提示
安装 sass 依赖,注意如果使用 Next.js 版本超过 13.1.1,可能会出现报错,因此需要将 Next.js 版本锁定在 13.1.1。
yarn add -D sass
在 next.config.js 中配置自定义页面扩展名,指定项目将打包指定后缀的文件作为页面。
const path = require('path');
module.exports = {
pageExtensions: ['page.tsx', 'page.ts', 'page.jsx', 'page.js'],
reactStrictMode: true,
swcMinify: true,
webpack: (config) => { config.resolve.alias = { ...config.resolve.alias,
'@': path.resolve(__dirname), };
return config; }, };
将文件名从 index.ts 修改为 index.page.tsx,_app.tsx 修改为 _app.page.tsx。
修改 index.page.tsx 文件:
// @/pages/index.page.tsx
import styles from './home/index.module.scss';
export default function Home() {
return <div className={styles.home}>官网实战</div>; }
在 .eslintrc.js 中关闭组件缺少 DisplayName 的规则:
'react/display-name': 'off'
修改页面目录结构
将首页仍保留为 index.page.tsx,使用 home 目录下的文件,每个页面都包括 api.ts、index.module.scss、index.page.tsx、components 等文件。
添加样式代码提示
在页面中只能使用 cssModule 的方式引入样式,全局样式放到 @/styles 文件目录下,并在 _app.tsx 中引入。
安装 VSCode 插件以获得 CSS Modules 的代码提示。
在 next.config.js 中修改配置以兼容驼峰风格:
const path = require("path");
const nextConfig = {
pageExtensions: ["page.tsx", "page.ts", "page.jsx", "page.js"],
reactStrictMode: true,
images: {
loader: "akamai",
path: "/", },
webpack: (config) => { config.resolve.alias = { ...config.resolve.alias,
"@": path.resolve(__dirname),
};
const rules = config.module.rules .find((rule) => typeof rule.oneOf === "object") .oneOf.filter((rule) => Array.isArray(rule.use)); rules.forEach((rule) => { rule.use.forEach((moduleLoader) => {
if (
moduleLoader.loader !== undefined && moduleLoader.loader.includes("css-loader") &&
typeof moduleLoader.options.modules === "object" ) { moduleLoader.options = { ...moduleLoader.options,
modules: { ...moduleLoader.options.modules,
exportLocalsConvention: "camelCase", }, }; } }); });
return config; }, };module.exports = nextConfig;
在引入样式时,使用 styles. 将触发代码提示。

响应式布局配置
安装 postcss-px-to-viewport
使用以下命令安装 postcss-px-to-viewport,这是一个用于将 px 单位转换为视口单位的 PostCSS 插件。
yarn add -D postcss-px-to-viewport
配置 postcss.config.js
在项目根目录下创建 postcss.config.js 文件,并添加以下配置,以实现对 px 单位的转换:
module.exports = {
plugins: {
"postcss-px-to-viewport": {
unitToConvert: "px",
viewportWidth: 1920,
unitPrecision: 5,
propList: ["*"],
viewportUnit: "vw",
fontViewportUnit: "vw",
selectorBlackList: [],
minPixelValue: 1,
mediaQuery: false,
replace: true,
exclude: undefined,
include: undefined,
landscape: false,
landscapeUnit: "vw",
landscapeWidth: 568, }, }, };
媒体查询
对于一些小尺寸的弹窗等元素,我们可能不希望进行响应式布局。可以利用 postcss 的 mediaQuery 特性,通过添加媒体查询来避免对 vw 的转换。比如:
@media (min-width: 1px) {
/* your styles here */
}
其他移动端适配的媒体查询则按照常规方式添加即可。
设备判断
为了更精准地判断设备,推荐使用 react-use 库中的 useWindowSize 钩子,结合用户代理字符串来判断设备类型。
安装 react-use
yarn add react-use
封装 useDevice 钩子
创建 useDevice.ts 文件,封装用于设备判断的自定义钩子:
import { useEffect, useState } from "react";
import { useWindowSize } from "react-use";
export const useDevice = () => {
const [isMobile, setMobile] = useState(true);
const size = useWindowSize();
useEffect(() => {
const userAgent =
typeof window.navigator === "undefined" ? "" : navigator.userAgent;
const mobile =
/Android|BlackBerry|iPhone|iPad|iPod|Opera Mini|IEMobile|WPDesktop/i.test( userAgent, ); setMobile(size.width <= 750 || mobile); }, [size.width]);
return { isMobile, }; };
在页面中使用
在页面中引入该钩子,并根据设备类型进行不同的布局:
import { useDevice } from "@/hooks/useDevice";
const YourComponent = () => {
const { isMobile } = useDevice();
return (
<> {!isMobile && <div>pc端布局</div>} {isMobile && <div>移动端布局</div>}
</> ); };
引入 Ant Design
安装 Ant Design
使用最新版本的 Ant Design(5.0),该版本采用 CSS-in-JS,本身支持按需加载,不再需要 babel-plugin-import 插件。只需安装依赖,然后引入即可。详细信息请查阅 Ant Design 官方文档。
yarn add antd
为了在旧浏览器上保持样式兼容性(例如在安卓微信中打开时),您可以使用 @ant-design/cssinjs 的 StyleProvider 来避免性能下降操作。
在 _app.page.tsx 中引入 Ant Design
import type { AppProps } from "next/app";
import "@/styles/globals.scss";
import { StyleProvider } from "@ant-design/cssinjs";
import { ConfigProvider } from "antd";
import zhCN from "antd/locale/zh_CN";
export default function App({ Component, pageProps }: AppProps) {
return (
<StyleProvider hashPriority="high"> <ConfigProvider locale={zhCN}> <Component {...pageProps} /> </ConfigProvider> </StyleProvider> ); }
如果需要引入 Ant Design 默认样式文件,可以选择在 _app.page.tsx 中添加以下引入:
import 'antd/dist/reset.css';
在页面中使用 Ant Design 组件
例如,在 index.page.tsx 中使用 Ant Design 按钮:
import { Button } from "antd";
<Button type="primary">Ant Design 按钮</Button>
修复 Ant Design 5.0 在打包 test 环境下的样式丢失
在 _document.page.tsx 中进行修改,具体解决方案请参考这里。
import { createCache, extractStyle, StyleProvider } from "@ant-design/cssinjs";
import Document, {
DocumentContext,
Head,
Html,
Main,
NextScript, } from "next/document";
export default class MyDocument extends Document {
static async getInitialProps(ctx: DocumentContext) {
const cache = createCache();
const originalRenderPage = ctx.renderPage; ctx.renderPage = () => originalRenderPage({
enhanceApp: (App) => (props) => ( <StyleProvider cache={cache}> <App {...props} /> </StyleProvider> ), });
const initialProps = await Document.getInitialProps(ctx);
return { ...initialProps,
styles: (
<> {initialProps.styles}
<style data-test="extract" dangerouslySetInnerHTML={{ __html: extractStyle(cache) }} /> </> ), }; } render() {
return (
<Html lang="en"> <Head /> <body> <Main /> <NextScript /> </body> </Html> ); } }
引入 Ant Design Mobile
安装 Ant Design Mobile
yarn add antd-mobile
配置 next.config.js
为了支持 Ant Design Mobile 的引入,可以通过两种方式配置 next.config.js。您可以选择其中一种方式,两者效果相同。
方式一:添加实验性配置,但可能会出现一些警告。
module.exports = {
experimental: {
transpilePackages: ["antd-mobile"], },
// 其他 Next.js 配置};
方式二:建议使用 next-transpile-modules 插件。
yarn add -D next-transpile-modules
修改 next.config.js:
const withTM = require('next-transpile-modules')(['antd-mobile']);
module.exports = withTM({
// 其他项目中的 Next.js 配置
});
去除 postcss-px-to-viewport 对 Ant Design Mobile 的转换
在 postcss.config.js 中添加排除规则,以防止对 Ant Design Mobile 的样式进行 px 到 viewport 单位的转换。
module.exports = {
plugins: {
"postcss-px-to-viewport": {
// 其他配置... exclude: [/antd-mobile/], }, }, };
在页面中引入 Ant Design Mobile 组件
在 index.page.tsx 中引入 Ant Design Mobile 的按钮组件:
import { Button as ButtonMobile } from "antd-mobile";
<ButtonMobile size="large" color="primary"> Ant Design Mobile 按钮
</ButtonMobile>
封装 Axios
安装 Axios
yarn add axios
创建请求封装文件 utils/request.ts
import { notification } from "antd";
import type { AxiosError, AxiosRequestConfig } from "axios";
import axios from "axios";
const instance = axios.create({
timeout: 30 * 1000, });
// 请求拦截
instance.interceptors.request.use(
(config) => config,
(error) => Promise.reject(error) );
// 响应拦截
instance.interceptors.response.use(
(res) => {
if ( res.data.code !== undefined && res.data.code !== 0 && res.data.code !== 200 && !(res.config as AxiosRequestConfig & { skipErrorHandler?: boolean }).skipErrorHandler ) { notification.error({
message: '异常',
description: res.data.msg || res.data.message, });
return Promise.reject(res.data); }
return Promise.resolve(res.data); },
(error: AxiosError<{ code: number; message?: string; msg?: string }>) => {
const { skipErrorHandler } = error.config as AxiosRequestConfig & { skipErrorHandler?: boolean };
if (error.response?.status === 401 && !skipErrorHandler) {
return; }
if (!skipErrorHandler) { notification.error({
message: '异常',
description: error.response?.data?.message || error.response?.data?.msg || error.message, }); }
return Promise.reject(error); } );
type Request = <T = unknown>( config: AxiosRequestConfig & { skipErrorHandler?: boolean }
) => Promise<T>;
export const request = instance.request as Request;
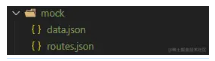
搭建 Mock 环境
在根目录下创建 mock 文件夹,并添加 data.json 和 routes.json 两个文件。
{ "indexStore": { "store": { "深圳": [ { "name": "坂田店", "address": "福田街道xxx", "marker": [ 114.294773, 22.587251 ] }, { "name": "坂田店", "address": "福田街道xxx", "marker": [ 114.294773, 22.587251 ] } ], "广州": [ { "name": "天河店", "address": "天河街道xxx", "marker": [ 114.294773, 22.587251 ] }, { "name": "天河店", "address": "天河街道xxx", "marker": [ 114.294773, 22.587251 ] } ], "佛山": [ { "name": "好地方店", "address": "而得到街道xxx", "marker": [ 114.294773, 22.587251 ] }, { "name": "好地方店", "address": "而得到街道xxx", "marker": [ 114.294773, 22.587251 ] } ] }, "seo": { "content": "坂田店、福田街道xxx、天河店、天河街道xxx、好地方店、而得到街道xxx" } }}
routes.json:
{ "/api/*": "/$1"
}
安装 json-server
yarn add -D json-server
安装 concurrently:
yarn add -D concurrently
添加命令:
"dev:mock": "concurrently \"yarn mock\" \"next dev\"",
"mock": "cd ./mock && json-server --watch data.json --routes routes.json --port 4000"
通过同时运行 mock 和 next dev 两个终端,您可以使用 mock 环境进行开发。
获取服务器端接口数据
Next.js 提供了 getStaticProps 方法,允许我们在项目构建时获取服务器端的静态数据。需要注意的是,该方法仅在构建时执行一次,数据必须在发布时进行更新,且仅能在页面级别上使用。
请注意,在实际发布时,应切换至真实数据,而仅在本地调试时使用模拟数据。
创建接口调用文件
在 @/home/api.ts 中,我们可以定义一个获取模拟数据的函数:
import { request } from "@/utils/request";
export interface IMockData {
store: { [key: string]: {
name: string;
address: string;
marker: number[]; }[]; };
seo: string; }
export function fetchMockData() {
return request<IMockData>({
url: `${process.env.NEXT_PUBLIC_HOST}/api/indexStore`,
method: "GET", }); }
在页面中使用接口数据
在 @/pages/index.page.tsx 中,我们可以调用上述接口,并将数据传递给页面组件:
import { Button } from "antd";
import { Button as ButtonMobile } from "antd-mobile";
import { fetchMockData, IMockData } from "./home/api";
import Layout from "../components/layout";
import styles from "./home/index.module.scss";
export default function Home(props: { mockData: IMockData }) {
console.log("mockData", props.mockData);
const headSeo = {
keywords: "sso、nextjs、antd、jiang",
description: `seo实践 ${props.mockData.seo}`,
title: "nextJs 官网 SSR 实战", };
return (
<Layout seo={headSeo}> <div> <Button type="primary">antd 按钮</Button> <ButtonMobile color="primary">antd-mobile 按钮</ButtonMobile> <div className={styles["home-container"]}>官网实战</div>;
</div> </Layout> ); }export async function getStaticProps() {
// 获取模拟数据 const res = await fetchMockData();
const mockData = res;
return {
props: { mockData }, }; }
封装通用布局组件
为了提高代码的可维护性,我们可以将一些通用的布局组件进行封装。
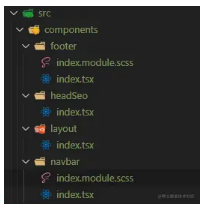
Footer 组件
// @/components/footer/index.tsx
import styles from "./index.module.scss";
export default function Footer() {
return (
<div id="footer" className={styles["footer-container"]}> 底部
</div> ); }
HeadSeo 组件
// @/components/headSeo/index.tsx
import Head from "next/head";
export default function HeadSeo(seo: { content: { keywords: string; description: string; title: string } }) {
return (
<Head> <meta charSet="UTF-8" /> <meta name="viewport" content="width=device-width, initial-scale=1.0, maximum-scale=1.0, user-scalable=0;" /> <meta name="keywords" content={seo.content.keywords} /> <meta name="description" content={seo.content.description} /> <meta name="robots" content="index, follow" /> <meta name="applicable-device" content="pc,mobile" /> <meta name="format-detection" content="telephone=no" /> <title>{seo.content.title}</title> </Head> ); }
Layout 组件
// @/components/layout/index.tsx
import Footer from "../footer";
import HeadSeo from "../headSeo";
import Navbar from "../navbar";export default function Layout(props: { children: React.ReactNode; seo: { keywords: string; description: string; title: string }; }) {
return (
<> <HeadSeo content={props.seo} /> <Navbar /> <main>{props.children}</main> <Footer /> </> ); }
Navbar 组件
// @/components/navbar/index.tsx
import styles from "./index.module.scss";
export default function Navbar() {
return (
<div id="footer" className={styles["navbar-container"]}> 头部
</div> ); }
通过这样的组件封装,我们可以在页面中更清晰地呈现内容,提高代码的可读性和可维护性。
▍优化图片加载性能是提升网站速度的有效手段之一。
封装 useWebp Hooks (@/hooks/useWebp.ts)
import { useEffect, useState } from "react";
export const useWebp = () => {
const [isSupportWebp, setIsSupportWebp] = useState(true);
useEffect(() => {
if (typeof window !== "undefined") {
const supportWebp =
window.document .createElement("canvas") .toDataURL("image/webp") .indexOf("data:image/webp") > -1;
setIsSupportWebp(supportWebp); } }, []);
return { isSupportWebp, }; };
封装 useOss Hooks (@/hooks/useOss.ts)
import { useCallback } from "react";
import { useWebp } from "./useWebp";
export const useOSS = () => {
const { isSupportWebp } = useWebp();
const getOssImage = useCallback(
(option: { originUrl: string; notSupportWebpWidth?: number; notSupportWebpHeight?: number; width?: number; height?: number; }) => {
let process = "";
if ((option.notSupportWebpWidth && !isSupportWebp) || option.width) { process = `w_${option.notSupportWebpWidth || option.width},`; } if ((option.notSupportWebpHeight && !isSupportWebp) || option.height) { process = `${process}h_${option.notSupportWebpHeight || option.height},`; } if (process) { process = `x-oss-process=image/resize,m_fill,limit_0,${process},`; } if (isSupportWebp && process) { process = `${process}/format,webp`; } if (isSupportWebp && !process) { process = `x-oss-process=image/format,webp`; } return `${option.originUrl}?${process}`; }, [isSupportWebp], );
return { getOssImage }; };
封装 OssImage 组件 (@/components/OssImage/index.tsx)
import { useOSS } from "@/hooks/useOss";
type Props = React.DetailedHTMLProps<
React.ImgHTMLAttributes<HTMLImageElement>,
HTMLImageElement
> & { notSupportWebpWidth?: number; notSupportWebpHeight?: number; ossWidth?: number; ossHeight?: number; };
export default function OssImage(props: Props) {
const { getOssImage } = useOSS();
return (
<img {...props}
src={getOssImage({ originUrl: props.src || "",
notSupportWebpWidth: props.notSupportWebpWidth,
notSupportWebpHeight: props.notSupportWebpHeight,
width: props.ossWidth,
height: props.ossHeight, })}
loading="lazy" /> ); }
在页面中使用 OssImage 组件 (@/pages/index.page.tsx)
import OssImage from "@/components/OssImage";
// 使用 oss,自动判断是否支持 webp
<OssImage style={{ background: "beige", }}
src="https://img.alicdn.com/tfs/TB11B9iM7voK1RjSZPfXXXPKFXa-338-80.png" notSupportWebpWidth={338} notSupportWebpHeight={80}/>
// 不使用 oss,正常传宽高
<OssImage style={{ background: "beige", }}
src="https://img.alicdn.com/tfs/TB11B9iM7voK1RjSZPfXXXPKFXa-338-80.png" width={338} height={80}
/>
通过这些封装,你可以更轻松地在项目中使用 WebP 格式和 CDN 进行图片优化。
▍数据渲染
在 Next.js 中,我们可以通过 getStaticProps 和 getServerSideProps 两个函数来实现数据的渲染。这两者只能存在一个,它们都在浏览器渲染之前调用。在开发过程中,可以在终端查看数据。
1. getStaticProps - SSG (静态生成)
getStaticProps 在项目构建打包时调用,生成静态 HTML 文件。这个过程只在构建时进行一次,适用于不经常变化的数据,具有较好的 SEO。
// 静态 SSG
export async function getStaticProps() {
// 获取 mock 数据 const res = await fetchMockData();
const mockData = res;
return {
props: { mockData }, }; }
2. getServerSideProps - SSR (服务端渲染)
getServerSideProps 在服务器接收到请求时更新,适用于经常改变的数据,但不利于 SEO。
export async function getServerSideProps() {
const data = await fetchMockData();
console.log("data", data);
if (!data) {
return {
redirect: {
destination: "/",
permanent: false, }, }; } return {
props: { data }, }; }
3. getStaticPaths - 生成多页面
可以使用 getStaticPaths 生成多个页面,例如生成新闻页面,搭配 getStaticProps 构造不同页面的数据。
@/static-path/[id].page.tsx
export default function ({ post }: { post: string }) {
return (
<div> <h1>Post: {post}</h1> </div> ); }
export async function getStaticPaths() {
const paths = new Array(10).fill(0).map((_, i) => ({
params: { id: i + 1 + "" }, }));
console.log("paths", paths);
return { paths, fallback: false }; }
export async function getStaticProps({ params }: { params: { id: string } }) {
console.log("params", params);
return { props: { post: `post ${params.id}` } }; }
总结
通过 getStaticProps 和 getServerSideProps,我们可以在 Next.js 中实现静态生成和服务端渲染,使项目更具弹性和性能。在服务器部署方面,可以参考相关文章。将来,我们还计划加入埋点、监控系统、后台管理系统等功能,并考虑将自己的博客切换到 SSR 方式。
希望这篇文章对你有所帮助,后续会持续更新。